Web Key Burger Stand Product Maintenance

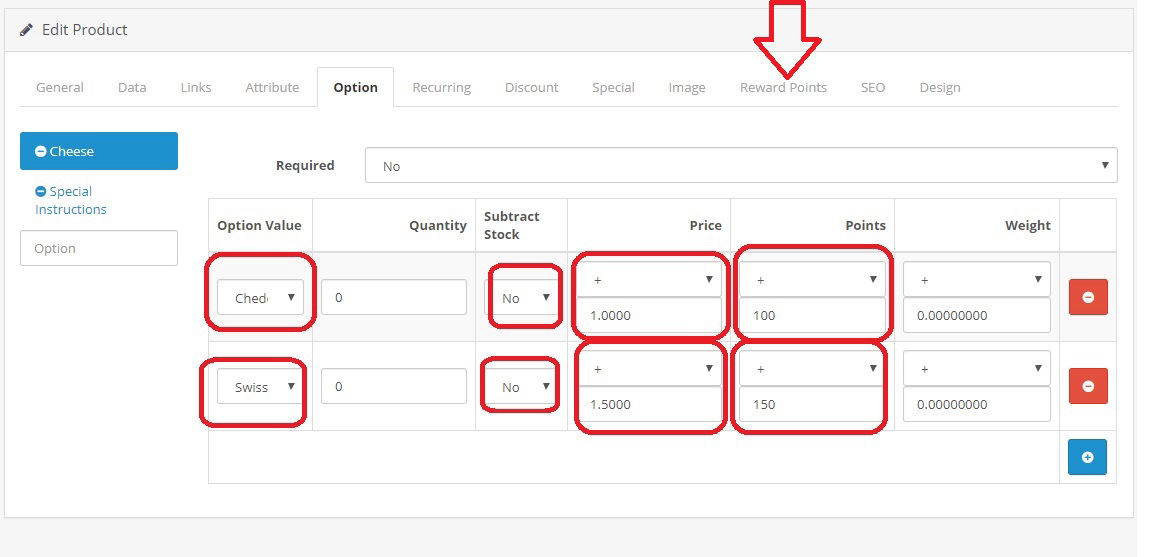
Add New Product by Copying

The easiest way to create a new product is to copy an existing product. To create a product from scratch, please read our detailed documentation.

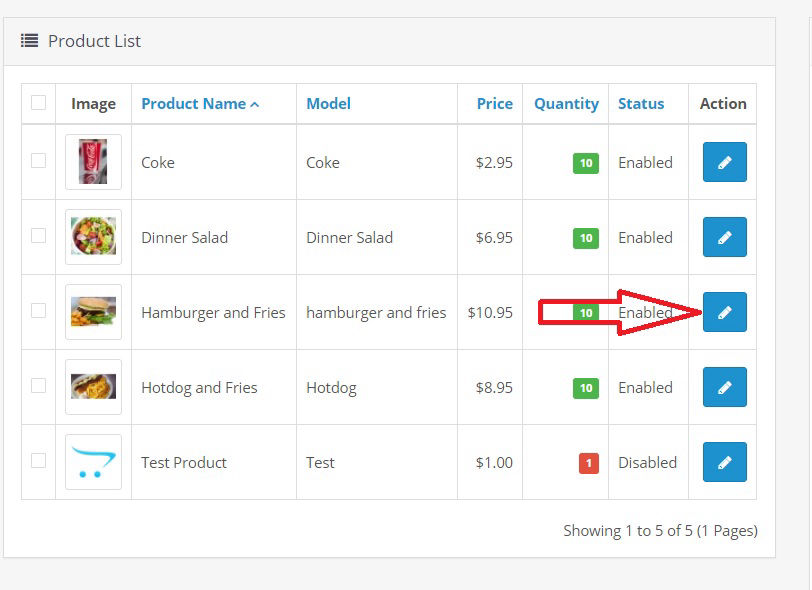
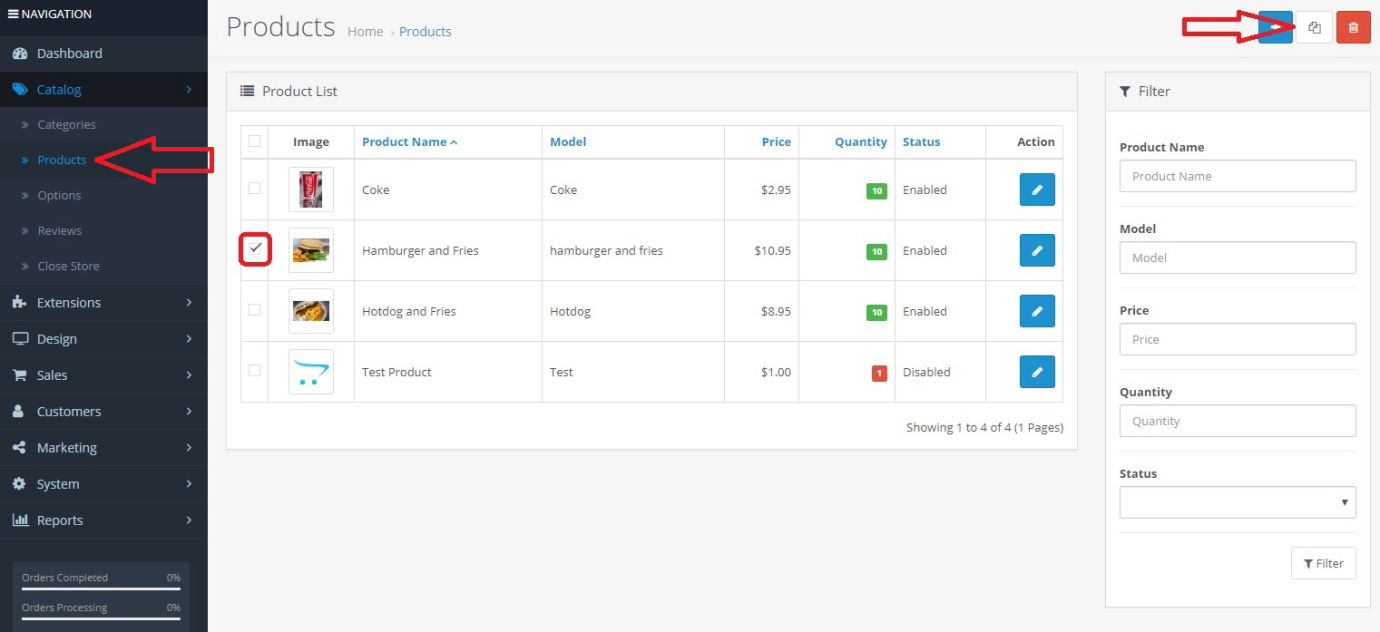
Navigate to the products list screen.

To copy a product, check the box next to it then click the copy button in the top right of the screen.

The new product has a "Disabled" status. Open the edit screen by clicking the edit button to the right. 

General Tab

On the general tab screen, input "Dinner Salad" as the product name and meta tag title. Input a description of the product in the description box. 

Click the data tab to continue.

Input "Dinner Salad" for model, input the price for the product and scroll down.

Input the largest number that can be sold on any single order for quantity.

Input the date to start selling the product for date available.

Change the status to "Enabled".

Input a number for sort order.  Lower numbers will be listed first. 

Click the links tab to continue.

Links Tab

Click the minus sign beside categories that should be removed.

Add Category

Put the cursor in the categories text box and begin typing the category name until "Salad" is listed in the dropdown list. 

Click salad to select so that the product will be listed under the "Salad" category. 

Click the option tab to continue.

Option Tab

Click the minus sign beside options that should be removed.

Add Options

Put the cursor in the options text box and begin typing the option name until "Cheese" is listed in the dropdown list.

Click the "Cheese" option to add and select.

"No" is selected for required because the customer is not required to select cheese for his or her salad. 

Click the plus button to add an option value


Only "Cheddar" and "Swiss" are selected because american is not a cheese choice allowed for the dinner salad. 

Select "No" for subtract stock.

Because customers are charged extra for cheese, select "+" and input the dollar amount of the extra charge for price.

Select "+" and input the price multiplied by 100 for points.

Click the image tab to continue.

Image Tab

To change the image, click the existing image then click the pencil to bring up the image manager.

Select one of the Images shown or click the get file button to browse for an image. 


Click the reward points tab to continue. 

Reward Points Tab

Input the product price times 100 for points.

Click the save button to save the changes made.

Edit Product Options

On the product list screen, click the pencil to the right of the product.

Remove Option Values

Click the option tab and select the option to edit.

To delete an option value, click the minus to the right.

Add Options

Put the cursor in the options text box and begin typing the option name until "Cheese" is listed in the dropdown list.

Click the "Cheese" option to add and select.

"No" is selected for required because the customer is not required to select cheese for his or her hamburger

Click the plus button to add an option value


Select the option values available to the customer

Select "No" for subtract stock.

Because customers are charged extra for cheese, select "+" and input the dollar amount of the extra charge for price.

Select "+" and input the price multiplied by 100 for points.

Click the save button.